
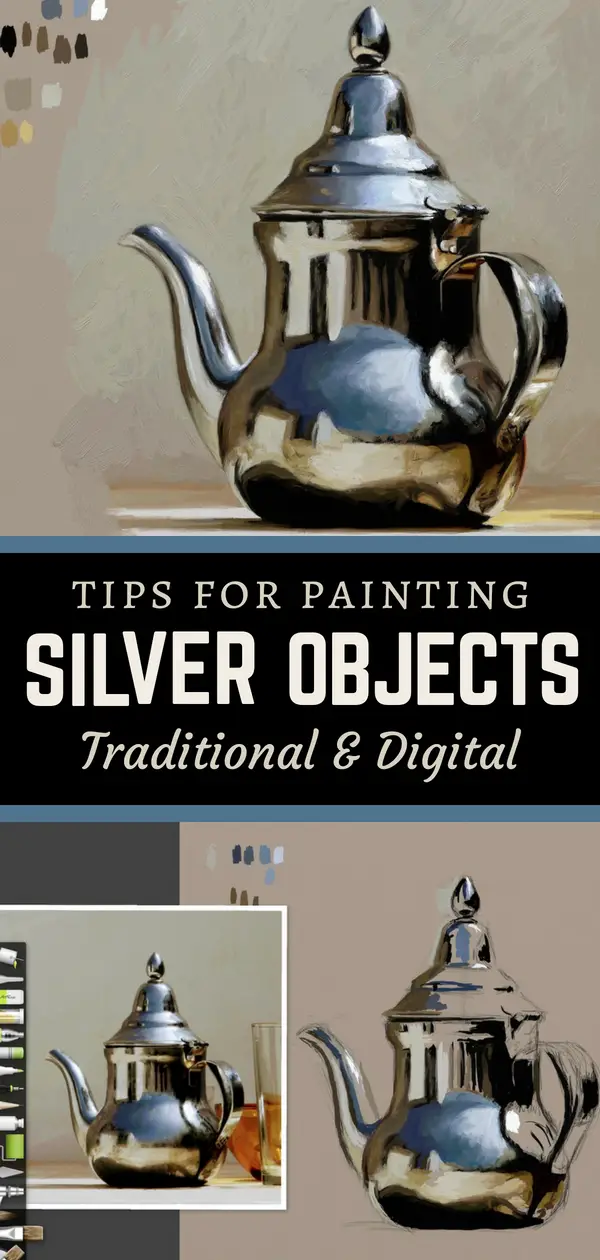

In today’s article, I’ll be going over 9+ tips and tricks for painting silver objects. When I took up painting again a little over a year ago, I found myself wanting to paint reflective surfaces for some unknown reason.

Painting silver objects or shiny things can seem very daunting at first, but when you break the reflections down into abstract shapes, it’s is much more manageable.
Painting Silver Objects Using ArtRage
I’ve done a few studies in acrylic which I’ll review later, but this step-by-step tutorial is done using ArtRage on my iPad Pro with the Apple Pencil. I seem to have trouble getting good photos of my physical paintings and taking screenshots of my progress on the ArtRage app makes things much easier. The method I use digitally is identical to how I would approach traditional painting, minus the mixing of paint.
For this study, I’m using a traditional approach by drawing the teapot freehand with the pencil tool. If painting traditionally in oil or acrylic, I would start with a charcoal sketch. If you are a digital artist and not wanting to draw but want to get to painting straight away, you can import your reference image to trace.
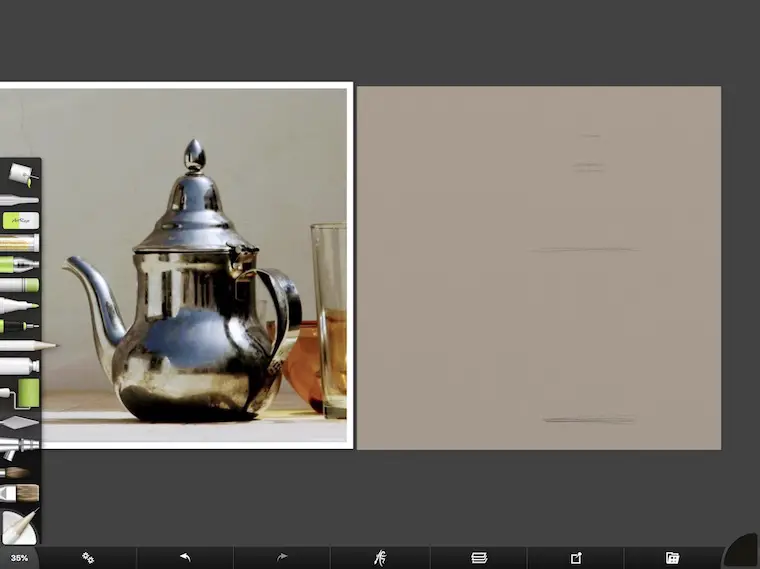
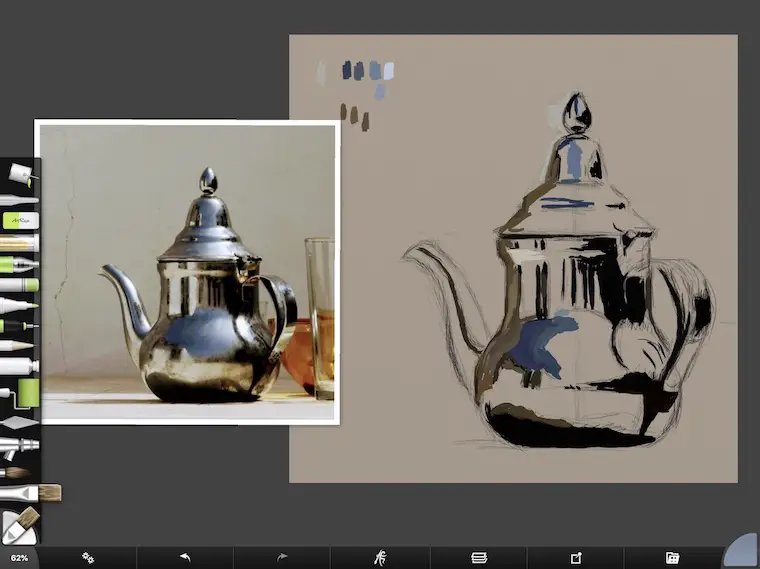
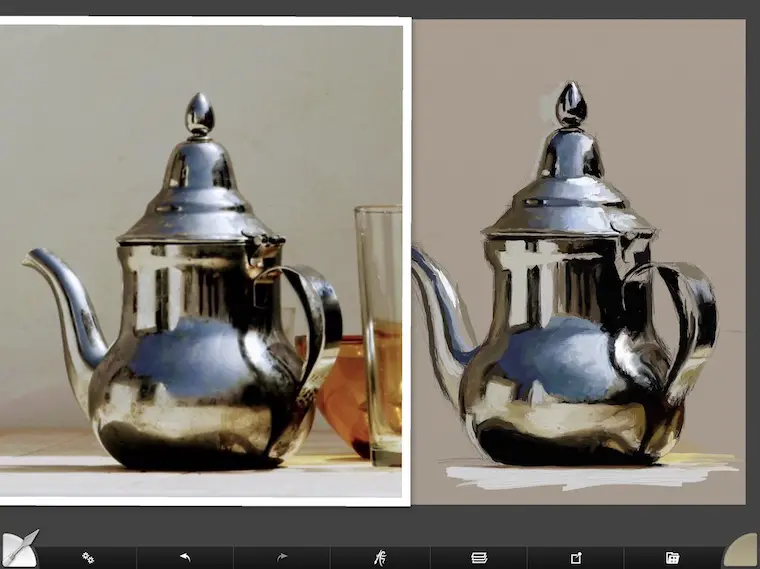
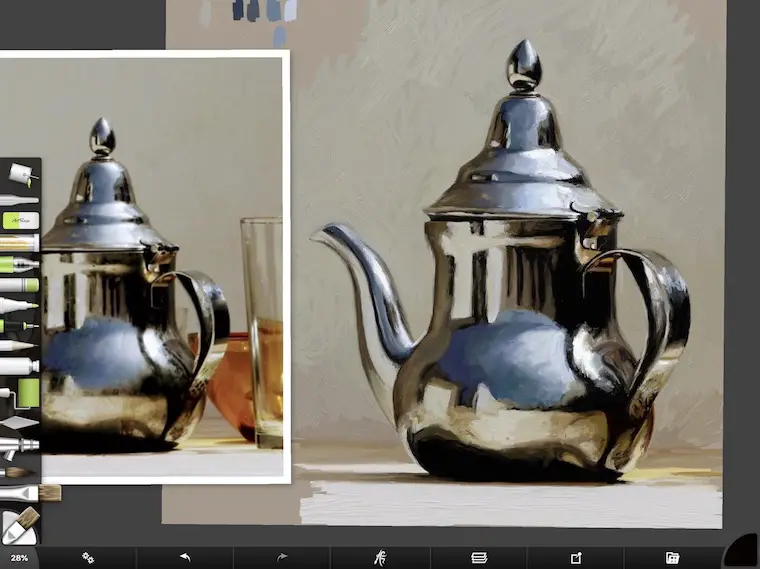
Tip 1 For Painting Silver Objects – Using The Sight-Size Method For Drawing
I’ve mentioned the sight-size method in other posts for drawing and painting. As you can see in the screenshot above, I’ve made my canvas and reference image the same size so I can get the proportions sketched in easily. There are many methods for drawing your subject, so choose the one that works best for you.

Above, I’ve roughed in a center line and am using my Apple Pencil and thumb to transfer measurements from the reference photo to the canvas. You could also use a proportional divider which would be much more simple. ArtRage has desktop versions of the program where you can bring in grids and guides to help with your drawing. The full version is ArtRage 6. It is very robust and a lot of fun to play in. There is also a Lite version of the program that is very feature-rich, but at a lower cost. If you love the look of oil painting and like digital art, this program has you covered. Plus, it’s fun.
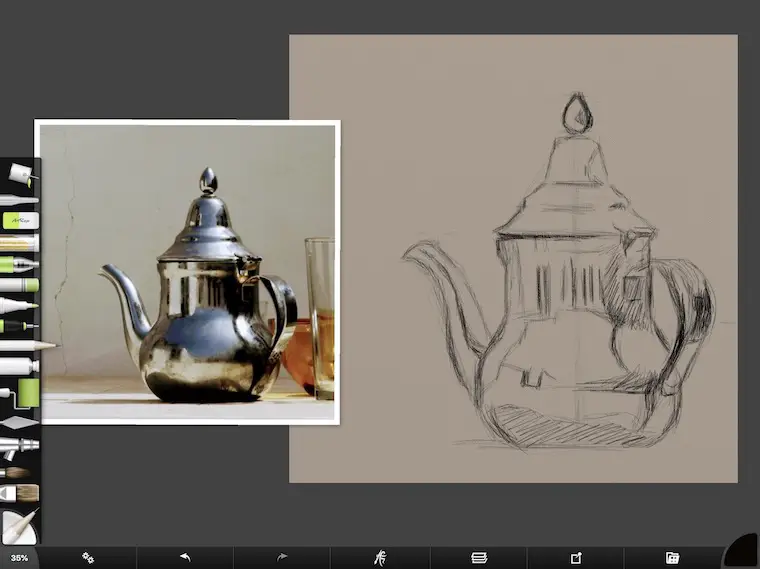
Below I’ve started connecting some of my initial marks to create the shape of the pot.

Next, I started roughing in the angle of the spout and lines on the lid (below).

Tip 2 For Painting Silver – Continually Check Your Drawing
In the image below, I noticed that the width of the upper part of the pot was not thick enough, so I had to go in and correct for that. Getting the drawing accurate is very important in making your reflective object look real. If something is off proportionally, then that mistake will make everything seem wrong in the final painting. Again, a proportional divider would come in handy with painting digitally on the iPad app and is terrific for checking shapes when drawing on canvas.
A thinner width on the teapot wouldn’t have thrown off the realistic quality of the painting in this instance, but I corrected it because viewers would be able to see the difference from the painting compared to the reference photo. Plus, it was an easy fix.

In the drawing above, the “hips” of the teapot are off slightly which could have made my study look distorted had I not corrected for that. You can see that I’ve started to correct it in the sketch below. I also know I can correct even more when I start painting, so I wasn’t worried too much about it.

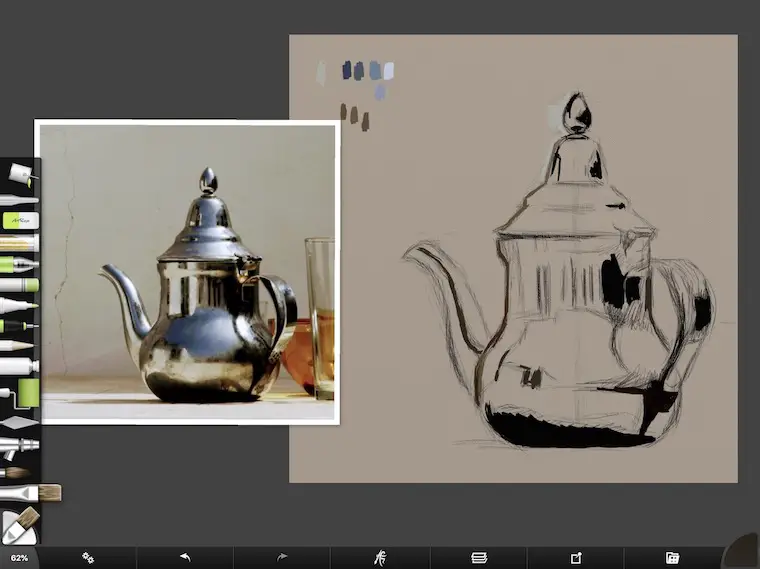
Tip 3 For Painting Silver – Be Aware Of Your Values
One of the biggest challenges for any artist painting realism is getting your values right. If your values are correct, you can do a lot less detail work and still have the painting read almost photographically. Our brains do an excellent job of filling in details for us if the values are correct. An invaluable tool to help with this is the Gray Scale & Value Finder. I use it for traditional and digital painting to determine value.
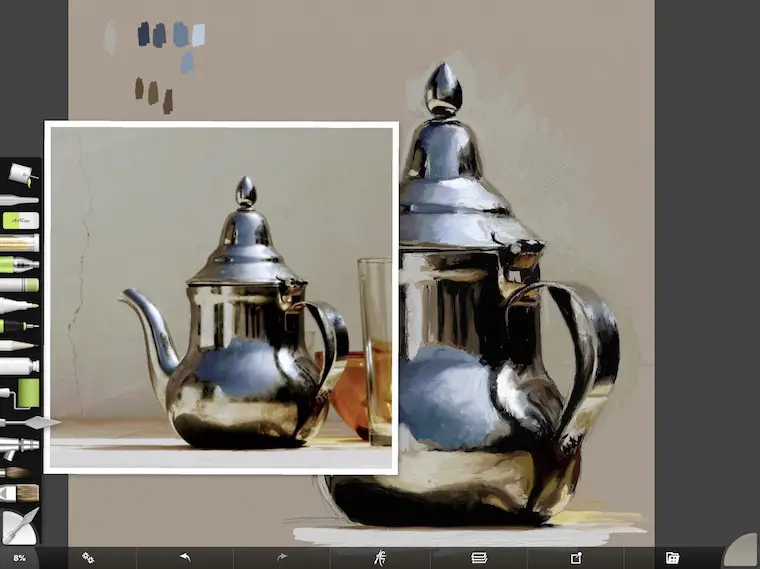
In the sketch below, I’m very loosely starting to establish where my dark areas will be. I did this at the same size as the reference photo so I could quickly go back and forth with my eyes to check for “differences”. This is one of the advantages of the sight-size method

I’ve made the drawing a little larger in the image below so you can see how I’m blocking things in. I’m pretty impatient with the drawing phase because I want to get to the painting part as soon as possible. Because of that, my sketches tend to be pretty loose. (What’s the point of getting the sketch beautiful when you’re going to paint over it?)
Final check on the drawing
Tip 4 For Painting Silver Objects – Establish The Dark Areas
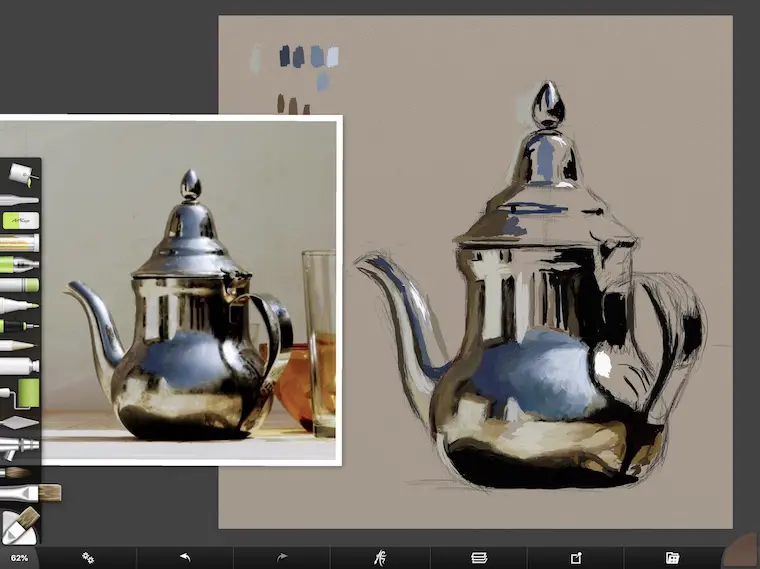
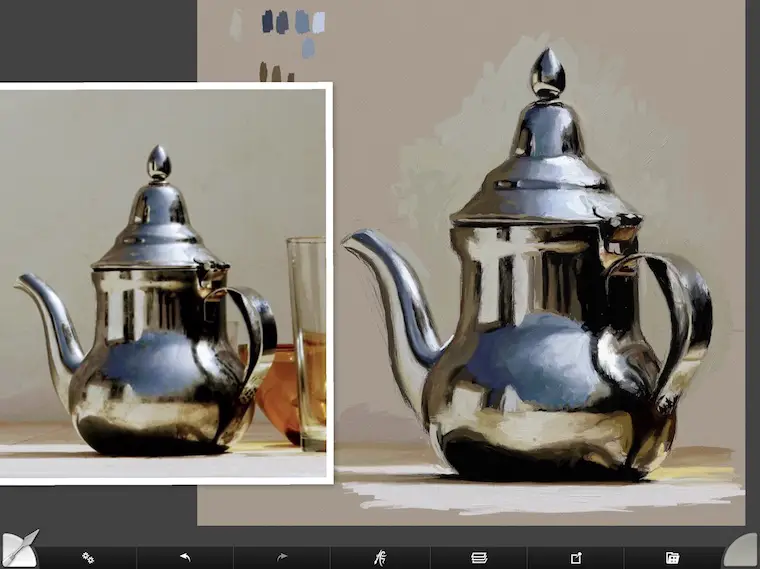
Below I’ve finally gotten to the fun part. When painting silver objects, I always start with the darkest areas first. Many times with silver or chrome, that color is black or a color very close to black.
Painting in the dark areas first
As you can see in the image above, I’ve roughed in most of the “black” areas (I missed a few) but then switched to adding in a few of the darker medium values.
I think now is a good time to mention that when painting silver objects, take a little time to look at your subject and identify what image is being reflected. Shiny objects are like three-dimensional mirrors, so the image reflected is wrapping around the shape of your object.
In the teapot reference photo below, I noticed that I had some sky and buildings wrapping around my object which you can see in the belly of the pot. The reflection gets inverted and stretched in the upper part of the body of the pot.
Moving on to medium tones
Tip 5 For Painting Silver – Pop In A Couple Highlights
Some artists are pretty strict about painting from dark to light and waiting to put in highlights. This is so you don’t milk up your brushes with lighter tones and accidentally turn your dark areas milky. If you are painting in oil alla prima style, this can be a huge problem to correct and something I have encountered occasionally.
When painting silver objects in oil, it may be beneficial to paint in some brighter reflective colors before you go too far so that you can preserve their purity and brightness. Just make sure you have brushes for your brights and brushes for your darks. If you are painting in acrylics, this isn’t a problem as the paint dries so quickly and if you are painting digitally as I’m showing now, it isn’t much of an issue at since you can “erase” your paint to keep things from getting muddy. If you are painting in oil, a palette knife is your best friend for scraping paint off.
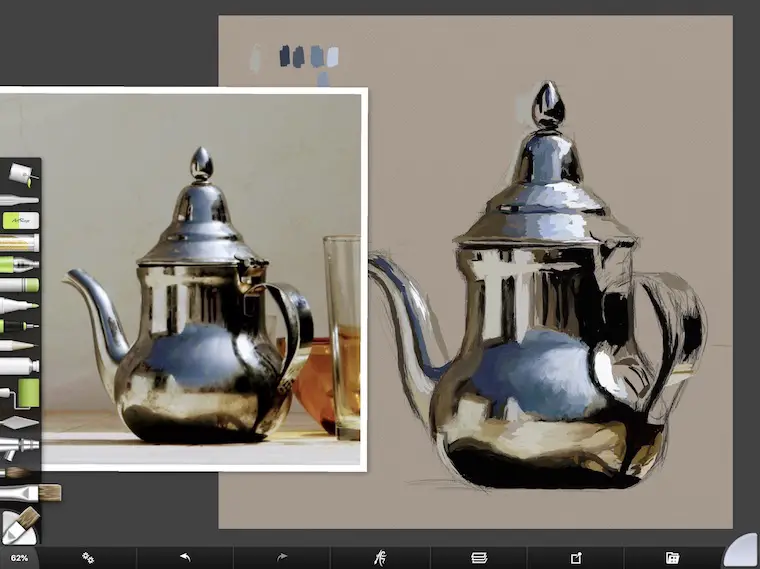
Just had to pop in a highlight
I like painting alla prima style all in one layer in ArtRage and don’t mind my colors getting mixed up. That’s the fun part for me. I’d encourage you to play around with a method that works well for you.
By adding highlights at this stage, the reflections start to come to life which is exciting. Who cares if you get some paint mixing around a bit? You can always scrape things off and correct them along the way.
Loading in paint and checking values
Tip 6: Squint & Don’t Worry Too Much About Blending
In the image above I am loading on paint being careful to match my values. I do a lot of squinting my eyes as I look at my reference while I lay down the paint. This helps me to see the values more clearly and keeps my brain for wanting to capture details which slows me down.
Using a very light touch with the blending tool
Maintaining a level of abstraction in the brushwork helps to keep the work looking like a painting up close rather than a photograph. Above I’ve started to blend a bit on the lid being careful not to get carried away with perfection.
Adding a cast shadow
Tip 7 For Painting A Silver Object – Backgrounds & Shadows
In the images above and below, I’ve started colors and shadows in the background around the base. Finally, the teapot is no longer floating in space! With shadows, take the time to color match and paint what you see not what you think you see. Shadows can be very graphic or very subtle. In this instance, the cast shadow is very subtle.
Shiny objects reflect the colors around them. In this study, I’ve omitted the orange bowl and glass on the right, which fortunately is not showing up very much in the teapot. If they were reflected, I would either have to include the objects so the reflections made sense or do some color correcting which could be very difficult depending on your skill level.
Filling in the background
I didn’t stray from the background color as this was a study. If I did decide to change the background, a color close to black would be the way to go but new challenges would arise on the dark edges of the pot. If you set up a still life for painting silver objects, make sure you have a background you are happy with and paint what you see. This will eliminate a lot of headaches!
Tip 8 For Painting Silver – Maintain Abstraction In Your Brushstrokes
I mentioned this point briefly above, but it was hard to see the brushstrokes in the screenshot. The image below is blown up so you can see just how messy my brushstrokes are. If you are painting on canvas, you will need to get up periodically, step back from the easel so you can see how your painting is coming together from a distance.
When you are up close on the canvas you can suffer from the dreaded “artist curse” and think your painting is horrible. Stepping back or taking a break and coming back with fresh eyes usually helps quite a bit. Especially when painting silver objects!
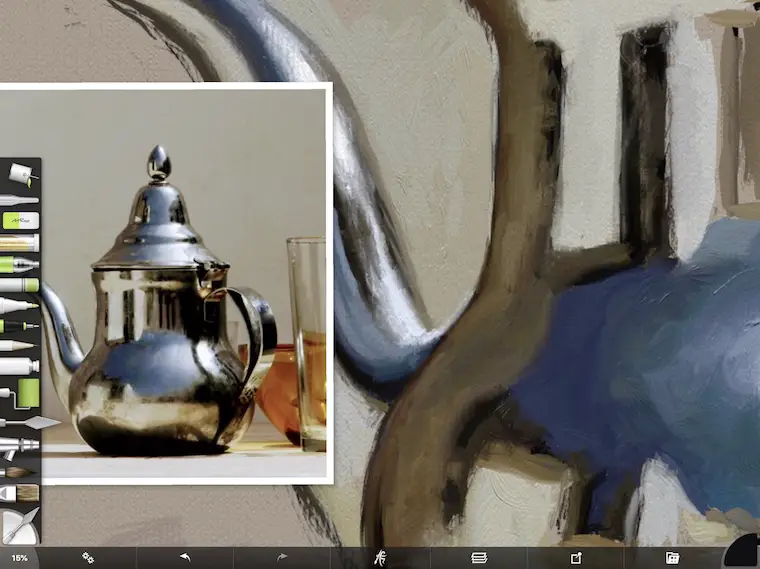
Yep – those brush strokes are pretty messy!
If you are painting digitally, you can zoom out of your canvas to see it small. Viewing it on your phone is even better for checking your work because it is so tiny on the screen.
When painting on canvas, take photos of your work on your phone as you progress so you can see the painting on a small-scale. This helps to check values and proportions and allows you to see the totality of your work objectively. I use this trick all the time and in the end, can use the progression images for articles like this. It’s a win-win!

Refining a few areas
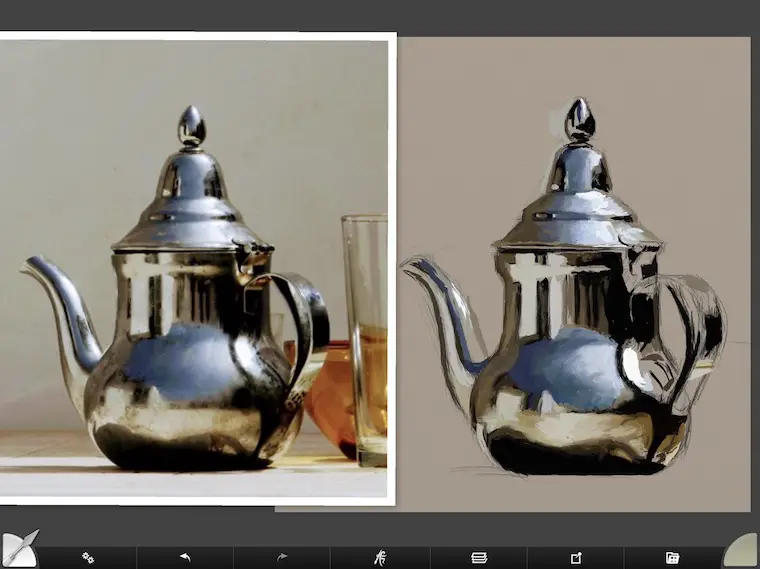
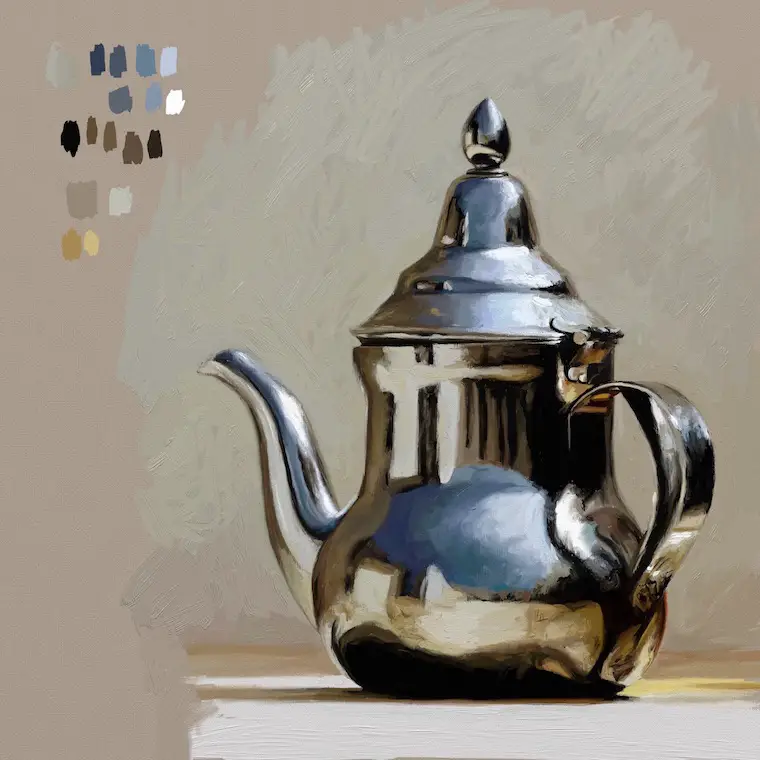
Above I have zoomed out on my iPad and am checking back and forth for any differences I may want to correct. There are little things here and there, but I could call it finished at this point and be done with the study. Comparing side by side with the reference is very useful when doing any representational art.
Almost finished with the study
Tip 9 For Painting Silver Objects – Don’t Be Afraid To Try
Above I’ve decided to paint in a little more of the background around the handle where the bowl and glass are supposed to be. In the image below I’ve blended a few areas out a bit and double-checked my brightest highlights.
For tip 9 I wanted to encourage you to just give it a try. You may not do well the first couple of times. Nobody does. But each time you will improve and eventually you will get a good result. When you do get a good result, it’s very motivating which makes you want to try again.
I may paint out the rest of the background one day
Previous Attempts At Painting Silver In Acrylic
Below is a study in progress of a cup of chai tea with a shiny spoon (and Penelope sleeping in the background). What was freaky about the spoon is it didn’t look like metal at all until I added the really bright highlights. If you put your thumb up to cover the two highlights on the round part of the spoon below, you can see how flat the spoon looks.
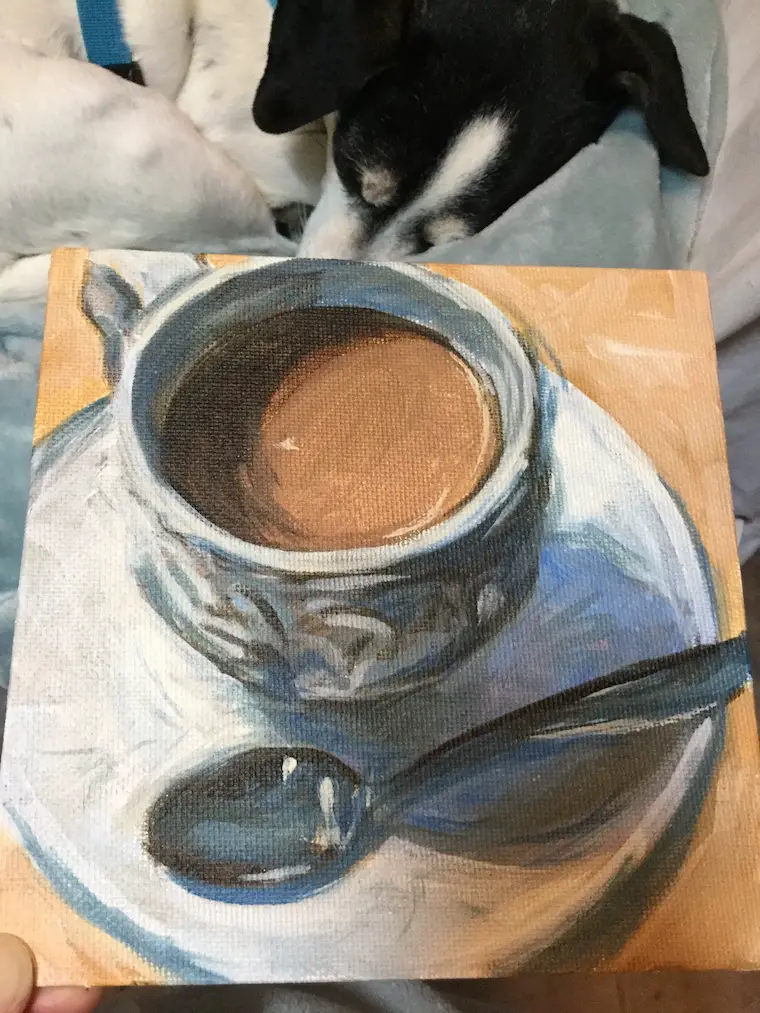
I love it when Penelope is by my side. I also love chai tea, which is why I painted it!
As you can see above, the spoon only has a dark blue/black, and two or three shades of medium blues. At first, I was going to keep this painting loose but decided to pump up the realism a bit which you can see below.
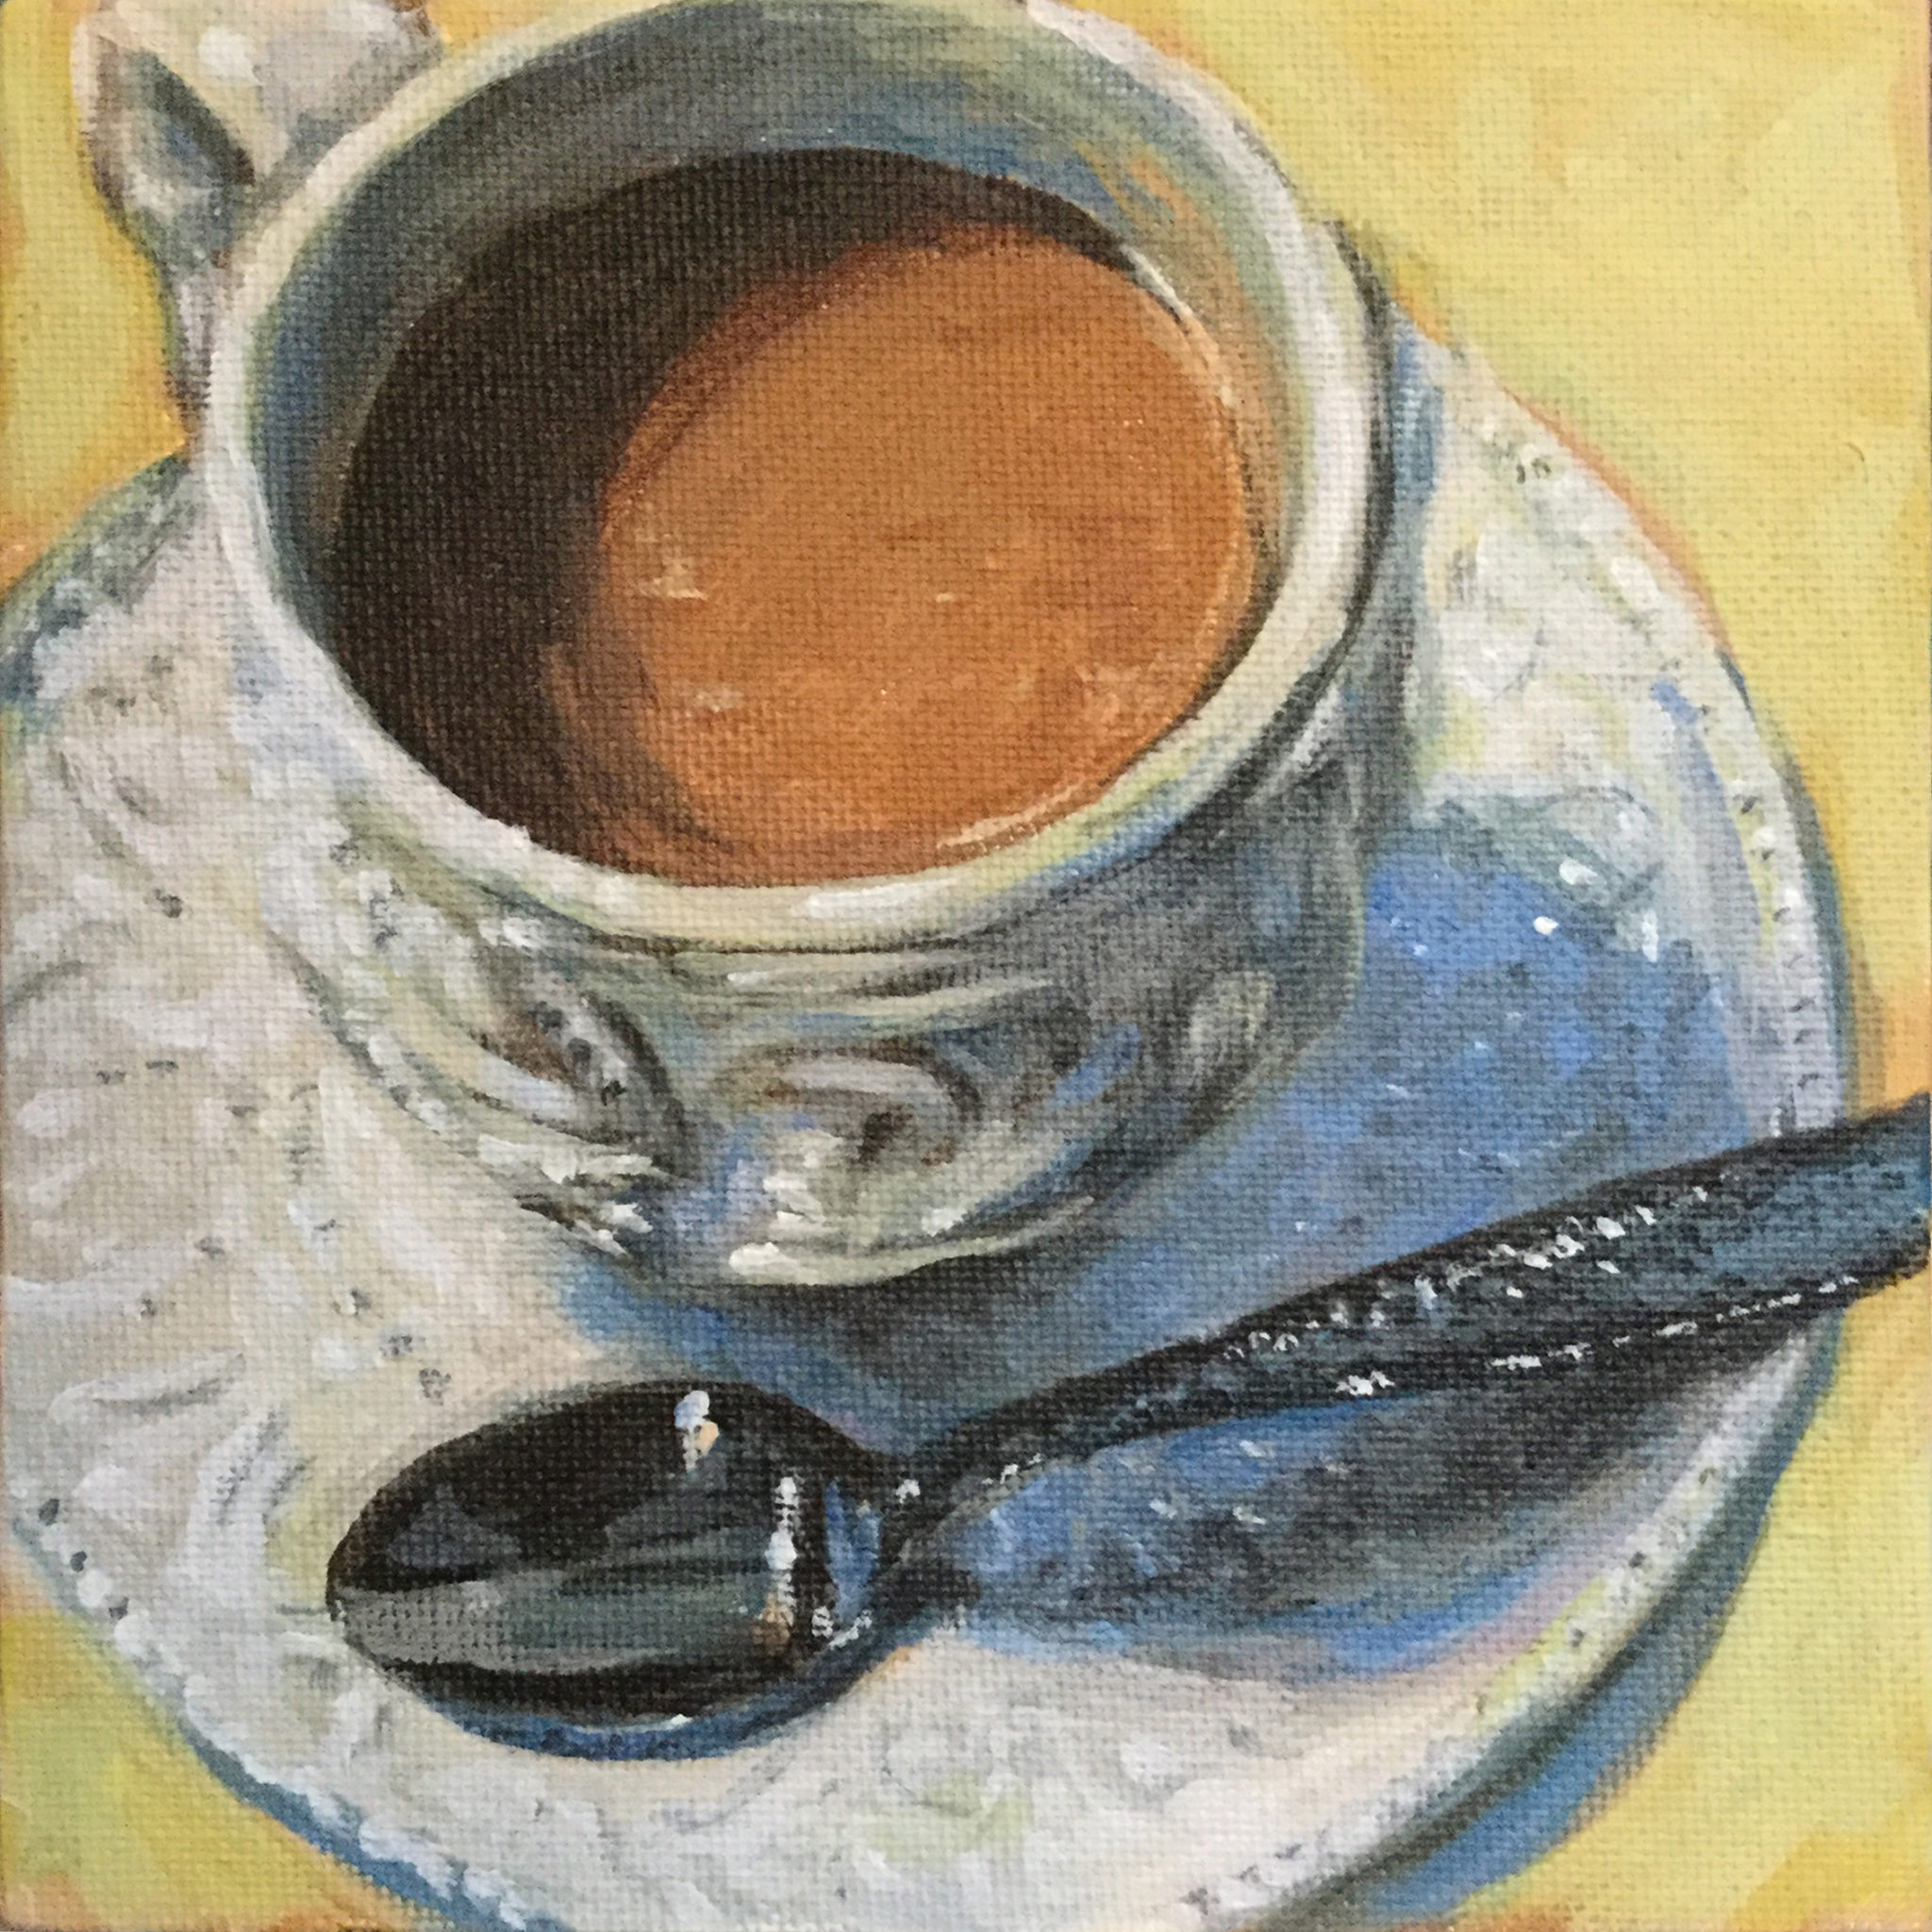
“Morning Chai” acrylic on canvas board.
The Highlights Create The Magic When Painting Shiny Things
Not much changed on the spoon above other than reinforcing the dark areas and adding some very bright highlights. It’s like magic when the highlights go in.
Bonus Tip – Paint Something Simple
The painting below of a still life study called “Lemon Water” was one of my biggest reflection challenges ever. The water in the glass was a NIGHTMARE! The tray was incredibly challenging as well. So my final bit of advice for painting silver objects is to keep it simple in the beginning. Paint a spoon without texture or a shiny cup without any embossing. Having small successes will give you the courage and motivation to moving on to more complicated subjects.
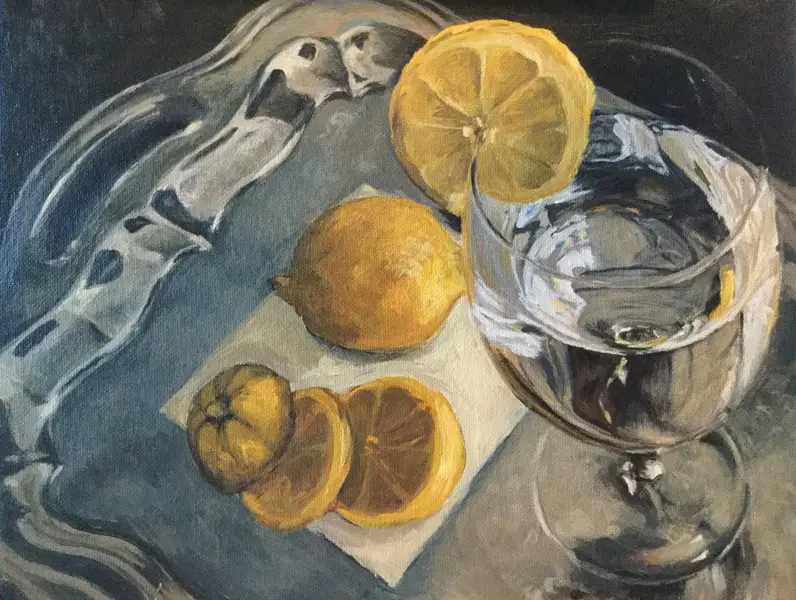
“Lemon Water” acrylic on canvas board. This is a horrible photo. One day I’ll get a better shot.
Thank You!
As always, thanks for stopping by the studio. I’ll be back with more tips for painting traditionally and digitally soon.
Other Popular Digital & Oil Painting Tutorials and Articles:
The #1 Way To Improve Your Painting – What is Value in Art?
iPad Painting Tutorial – How to Paint A Cat
https://shelleyhannafineart.com/paint-a-cat/
8 Tips for Painting Black Fur
https://shelleyhannafineart.com/8-tips-for-painting-black-fur-traditional-digital/
7 Portrait Painting Tips For Traditional And Digital Painters
https://shelleyhannafineart.com/portrait-painting-tips/
How To Paint A Dog Portrait Step-By-Step In Oil
https://shelleyhannafineart.com/how-to-paint-a-dog-portrait/